
Test your API using Rest Client VS Code Extension (No Postman, Insomnia needed)

Principal Architect | Driving Cloud Transformation & Application Modernization with AWS & IBM Cloud | Serverless & DevOps Leader | Industry Speaker
VS Code IDE is very popular among developers and it has tons of extensions available to make life simpler. One of them is Rest Client (author: Huachao Mao). I use this extension so that I don’t have to rely on external tools like Postman, and Insomnia.
Let us see how we can use this extension and use all the features that will make us forget any other tools :-)
Install REST Client extension in your VS Code.
Create a file with a .http extension (in my case, I will create a file with the name
apitest.http)Open this file in your VS Code Editor and let’s start testing out APIs.
Syntax:
@var_name =

<METHOD_TYPE>
<HEADER_KEY>: <HEADER_VALUE>

<REQUEST_BODY>
The variables are prefixed with @ and they are referenced within the definition with {{ var_name }}
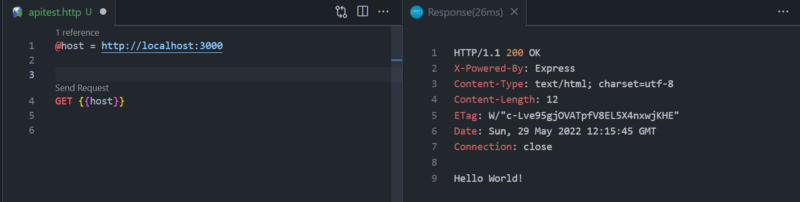
Let’s assume, we have an API running on http://localhost:3000, we could execute this by just the below statement. There will be a ‘Send request’ option available just above your definition which you can click and execute. This will open VS Code Pane with the Response along with headers.
GET http://localhost
OR
GET {{host}} // if you had defined a variable with the name host
To specify multiple APIs within the file, you need to separate it using triple hash ###
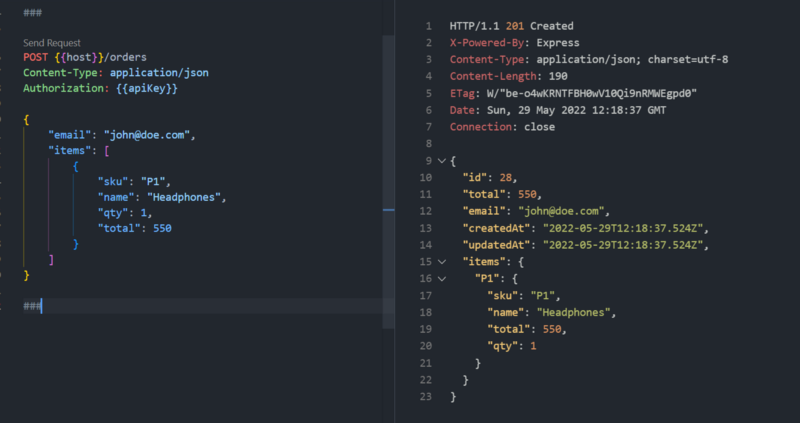
Executing POST is also simple as GET. You just need to mention the Content-Type along with the Request Body as shown below.
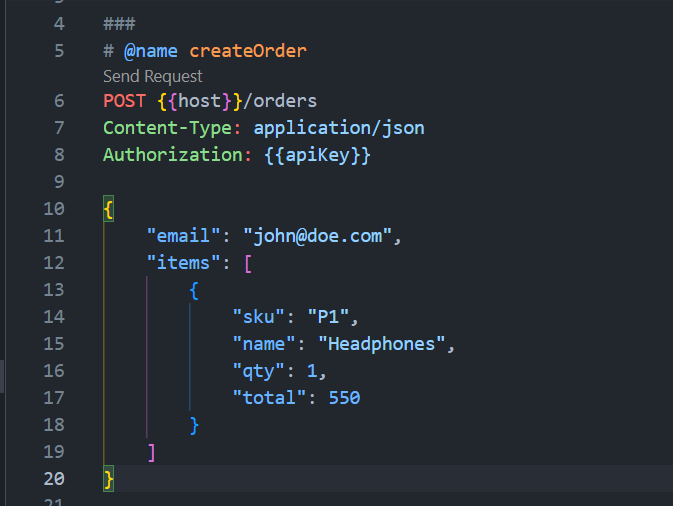
To “Extract” the value from the Id field of the response and use it in subsequent APIs, you need to ‘name’ the API so that the response can be stored within that context.
To name , you need to specify the following above your definition
# @name
e.g # @name createOrder
Look at line no: 5 in the below screenshot. So once you execute this API, it will store the response within the createOrder variable context.
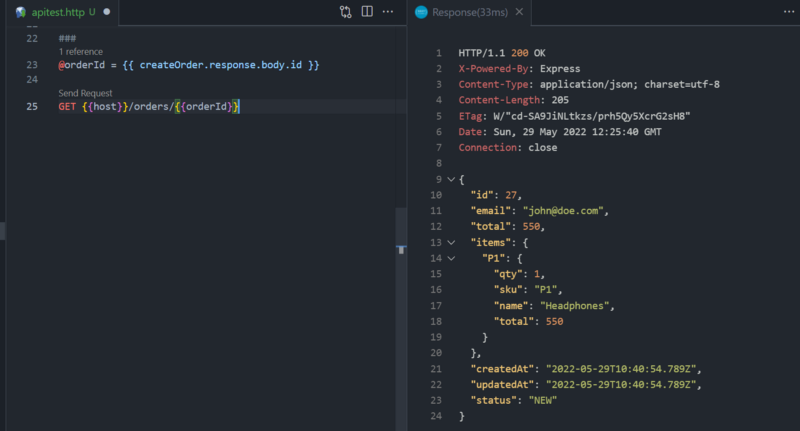
You can now use the value in the subsequent APIs by defining a variable and assigning the value from the .response.{body|headers}.
i.e {{ createOrder.response.body.id }}
Shared Environment Variables and Environments
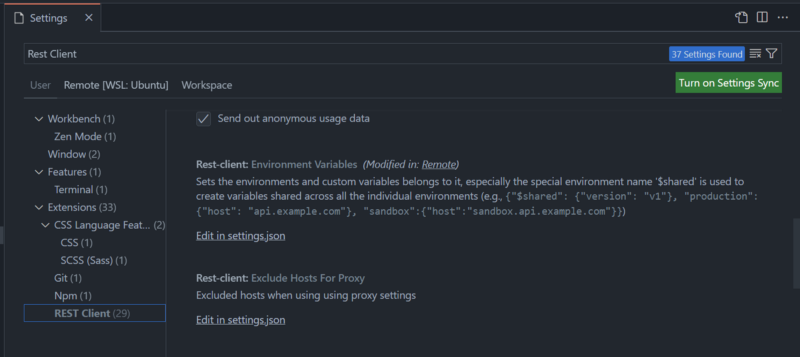
To define Shared/Global variables or environments, you need to edit the Settings.json for the Rest Client Extension.
Click on Preferences within the VS Code and navigate to REST Client. Scroll a bit down and under the section Environment Variables, click on Edit in settings.json

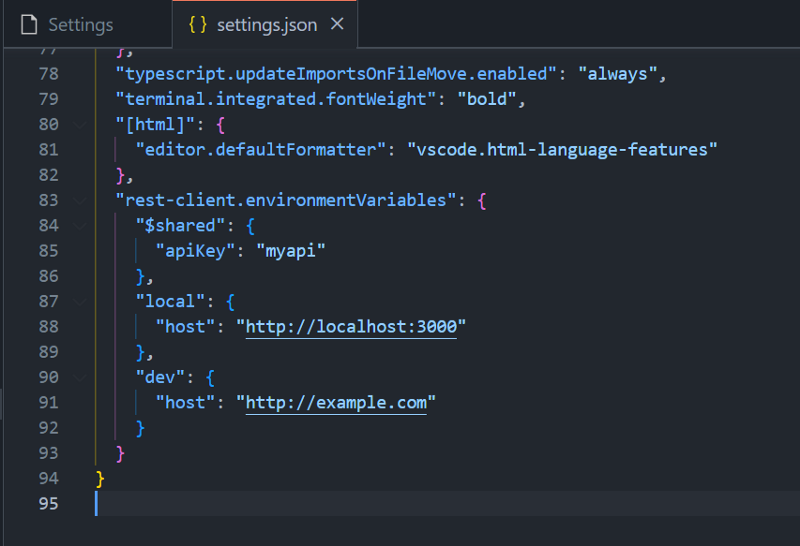
This will open a file within the editor and it will have a predefined key called $shared. Whatever you define within this will be available to your entire context irrespective of whether you have selected an environment or not.
In addition, you can define your environments by adding them to the file as shown below. In the below screenshot, we have defined one key within a shared context and 2 environments (local, dev) with host variables in it.
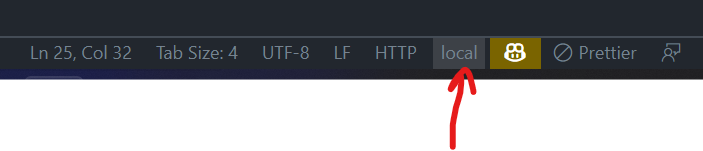
You can now select the environment by pressing Ctrl + Alt + E on your keyboard which will display a UI where you can select the environment that you want to activate.
Also, you will be able to trigger the same using the option within the VSCode status bar as shown below
The other important benefit of using this approach is you can just commit this file into your source repository and all the developers within your team will be able to pull this and run them within their VS Code environment to test the functionality without having to import or sync to any other external tool.
I have also published a video on the same. You can go through it, like and also Subscribe to my channel :-)
Clap, share, comment, and give me feedback. I’d love to hear your thoughts!
Happy Learning. Do follow to get updates on upcoming articles.