SSL using Let’s Encrypt

Principal Architect | Driving Cloud Transformation & Application Modernization with AWS & IBM Cloud | Serverless & DevOps Leader | Industry Speaker
Without Strong Encryption, you will be spied on systemically by lot’s of people
In this post, we will see how we can secure our site using SSL certificate using Let’s Encrypt. It’s known that SSL/TLS encryption of your website leads to higher search rankings and better security for your users. However, there are a number of barriers that have prevented website owners from adopting SSL such as the cost and the manual processes involved in getting a certificate.
With Let’s Encrypt, they are no longer a concern. Let’s Encrypt makes SSL/TLS encryption freely available to everyone.
Before we dive in , Let’s understand what Let’s encrypt it. Let’s Encrypt is a free, automated, and open certificate authority (CA). and are trusted by most browsers today. In addition, Let’s Encrypt fully automates both issuing and renewing of certificates. WOW — Isn’t that exciting ??
Prerequisites
- Any webserver like Apache , Nginx. (In this article, we will be using Nginx)
- Own a custom domain.
- Create a DNS record (A record) that associates your domain name and your server’s public IP address.
Let’s get started.
Install and Configure Nginx
Please refer to the documentation outlined here.
I am using Ubuntu so it’s as easy as executing the below command:
sudo apt install nginx
Check if service is running
sudo service nginx status
Output:
durgadas@dk:~$ sudo service nginx status
● nginx.service - A high performance web server and a reverse proxy server
     Loaded: loaded (/lib/systemd/system/nginx.service; enabled; vendor preset: enabled)
     Active: active (running) since Sat 2021-05-22 16:13:25 UTC; 16h ago
       Docs: man:nginx(8)
    Process: 1359 ExecStartPre=/usr/sbin/nginx -t -q -g daemon on; master_process on; (code=exited, status=0/SUCCESS)
    Process: 1370 ExecStart=/usr/sbin/nginx -g daemon on; master_process on; (code=exited, status=0/SUCCESS)
   Main PID: 1371 (nginx)
      Tasks: 3 (limit: 1117)
     Memory: 4.3M
     CGroup: /system.slice/nginx.service
             ├─1371 nginx: master process /usr/sbin/nginx -g daemon on; master_process on;
             ├─1421 nginx: worker process
             └─1422 nginx: worker process
May 22 16:13:25 vm-1 systemd[1]: Starting A high performance web server and a reverse proxy server...
May 22 16:13:25 vm-1 systemd[1]: Started A high performance web server and a reverse proxy server.
Configuration
In the following file /etc/nginx/sites-available/default , update the value against the server_name to the domain-name you own.
server{
  .......
    server_name cert.durgadas.in;
  .......
}
Once done restart the nginx using service nginx restart
Create DNS Record and Verify the Site
- Create ‘A’ record in your DNS setting to point to the Server where you have NGINX installed.
- Hit your domain in the browser and verify that the NGINX page is displayed with “Non Secure”
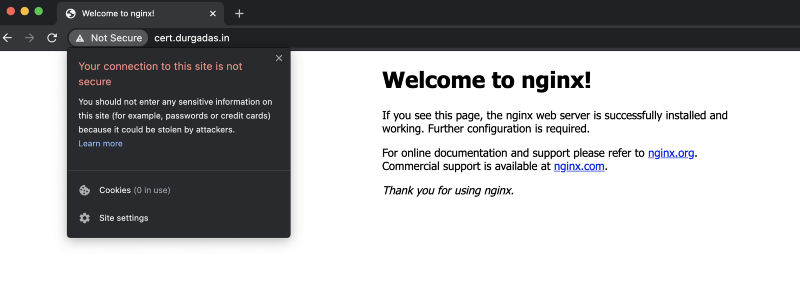
Unsecured Site
Install CertBot Client
Visit the certbot site : https://certbot.eff.org/ to install the client based on your OS and Server.
As we are using Ubuntu, we can install using the following command
sudo snap install --classic certbot
Obtain SSL Certificate from Let’s Encrypt/
sudo cerbot --nginx -d cert.durgadas.in ##replace cert.durgadas.in with your domain name
In the process, you will be requested for certain information like email , consent to register with ACME etc.
Output:
durgadas@dk:~# sudo certbot --nginx -d cert.durgadas.in
Saving debug log to /var/log/letsencrypt/letsencrypt.log
Plugins selected: Authenticator nginx, Installer nginx
Enter email address (used for urgent renewal and security notices)
 (Enter 'c' to cancel): xxxxxxxxxx
- - - - - - - - - - - - - - - - - - - - - - - - - - - - - - - - - - - - - - - -
Please read the Terms of Service at
https://letsencrypt.org/documents/LE-SA-v1.2-November-15-2017.pdf. You must
agree in order to register with the ACME server. Do you agree?
- - - - - - - - - - - - - - - - - - - - - - - - - - - - - - - - - - - - - - - -
(Y)es/(N)o: Y
- - - - - - - - - - - - - - - - - - - - - - - - - - - - - - - - - - - - - - - -
Would you be willing, once your first certificate is successfully issued, to
share your email address with the Electronic Frontier Foundation, a founding
partner of the Let's Encrypt project and the non-profit organization that
develops Certbot? We'd like to send you email about our work encrypting the web,
EFF news, campaigns, and ways to support digital freedom.
- - - - - - - - - - - - - - - - - - - - - - - - - - - - - - - - - - - - - - - -
(Y)es/(N)o: N
Account registered.
Requesting a certificate for cert.durgadas.in
Performing the following challenges:
http-01 challenge for cert.durgadas.in
Waiting for verification...
Cleaning up challenges
Deploying Certificate to VirtualHost /etc/nginx/sites-enabled/default
Redirecting all traffic on port 80 to ssl in /etc/nginx/sites-enabled/default
- - - - - - - - - - - - - - - - - - - - - - - - - - - - - - - - - - - - - - - -
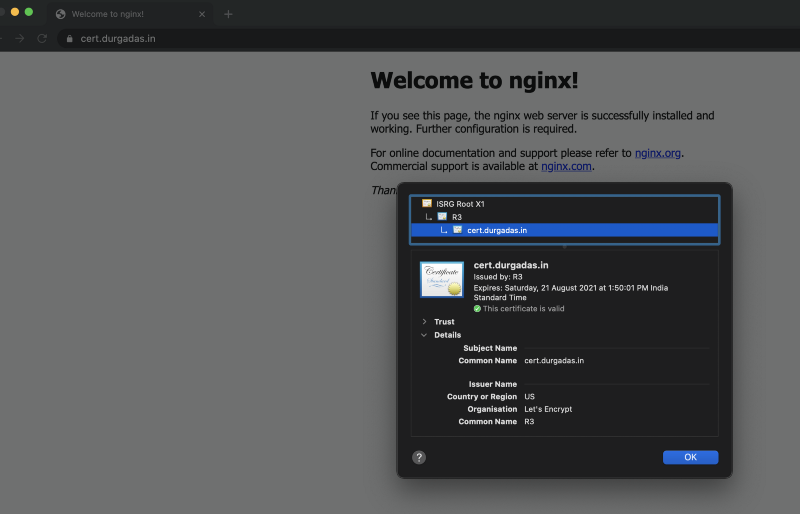
Congratulations! You have successfully enabled https://cert.durgadas.in
- - - - - - - - - - - - - - - - - - - - - - - - - - - - - - - - - - - - - - - -
Verify Site
Automatically Renew Let’s Encrypt Certificates
Let’s Encrypt certificates expire after 90 days. We can renew the certificates automatically by adding the below to crontab.
0 12 * * * /usr/bin/certbot renew --quiet
Clap, share, comment, give me feedback. I’d love to hear your thoughts!
Happy Learning.